Tools needed:
- Oven that the Tail can fit in
- Small/medium head Phillips screw driver
- Small and thin Flat Head scredrivers OR some kind of Flat pry sticks(Two will help in opening)
- Rag or towel to prevent scuffing the lens on hard surfaces
- Heat Gun (Oven is fine to open & close, but I recommend using heatgun to reseal tails
- Oven mits or something to help hold the hot tail light)
- Cutting tool for plastic(dremil,razorblade knife,etc)
STEP 1:
- Heat your oven up to 225 Degrees Fahrenheit.
- Remove the 5 Screws on the back perimeter. If they are hard to remove. Place the tail in the oven for a minute to help loosen the glue.
Step 2:
- Place one tail in the oven and wait 10 minutes. This will soften the sealant glue so it will be plyable.
- Once thoroughly heated up. Use an oven mit or something to Pull the tail out of the oven.
- Place it on the towel so it doesn’t get scratched by hard surfaces.
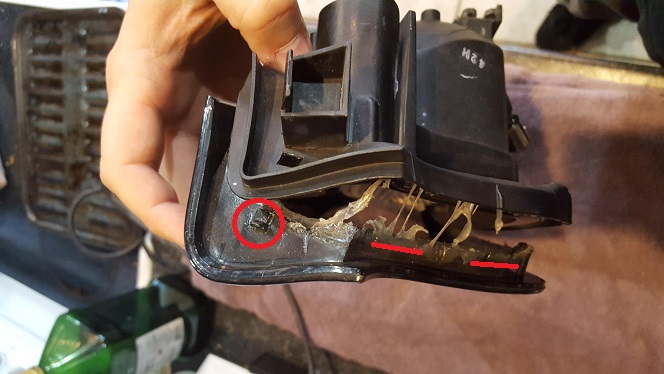
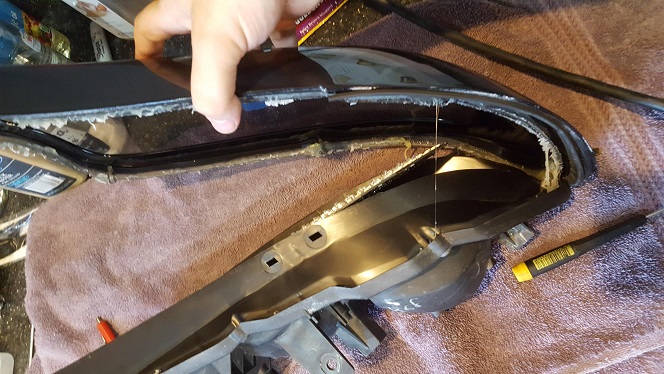
- Start Prying from the upper edge of the tail where it meets the center trim piece.
- Pry up near the little plastic tab to help it over the locking notch.
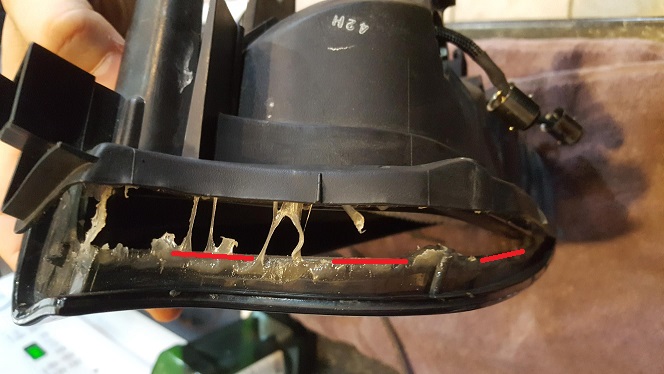
- The two red lined areas are good spots to start prying with your flat screw drivers. Dig down into the channel and pry. The backing plastic may deform, but that’s ok. With heat it can be molded back into shape if needed.
- MAKE SURE TO PRY ON THE Channeled Ridges and NOT THE LENS EDGE.
Step 3:
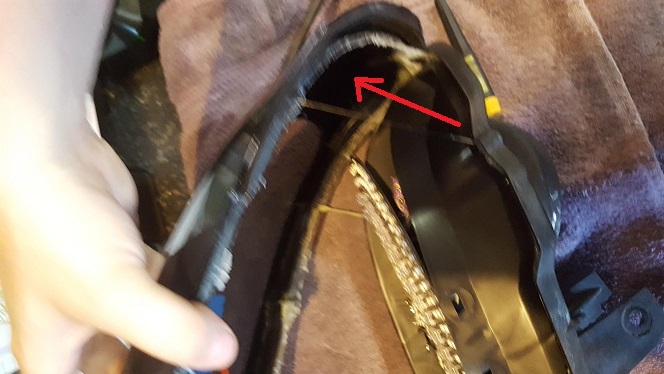
- Pry along the lower portion of the tail. starting from the edge near the center of the car. It will be the easiest section to get loose.
- Remember to put it back in the oven if it starts to cool down and get hard to pry on. You may need to do this 2-5 times.
- Once you get 1/3rd of the way down the bottom of the lens. You may be able to use your hands to pry from the 3rd brake connection area to pull the top channel apart.
Step 4:
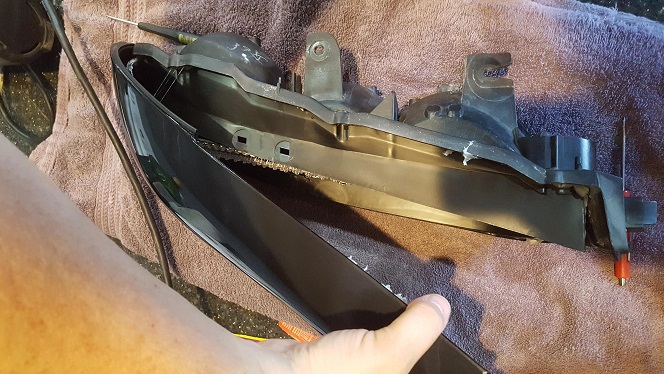
- Now that it’s staring to come apart. It should start moving quickly.
- Be careful on how much leverage you’re using. When in doubt, stop and put it back in the oven again to loosen up the glue.
- Once you get the top almost apart, you need to change your prying direction.
- The bottom corner will crack if you pry outward, you need to pry out AND down at the same time with a bit of twist. As you pull it apart you’ll see it’s path and just follow it as best as you can.
- You should be at the point that it will come apart completely
Step 5:
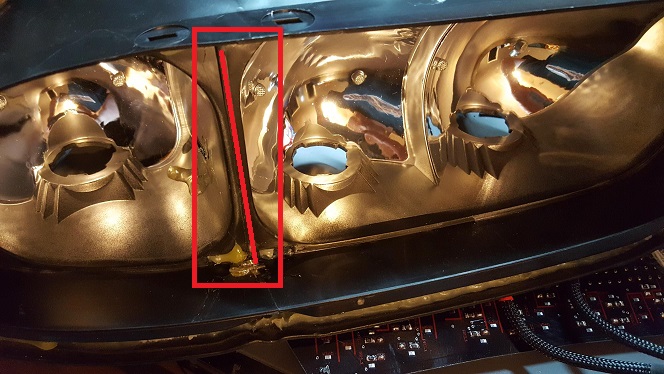
- Now that the tail is open, you’ll need to remove the two colored diffusing lenses.
- There are two screws holding them in. Remove them and put them aside for now.
- Use the flat head screw drivers to pry from the dividing section and the lenses should start popping out. They have little plastic retaining tabs holding them in place.
- Now We will need to trim the divider between the brakes & Turns out for more room. Cut as close as you can to the edges and back.
Step 6:
- Installing the Led circuit board.
- Use one of the diffusing lens screws in the top edge of the PCB. This will screw through to the original mounting point on the top inner edge of the tail.
- as You install, make sure the bulb connectors fit through the OEM holes. They will be in natural order(inner 2 are Running& Brake// Outer edge is Turn)
Step 7:
- Reinstalling the Lens.
- I recommend using a heat gun for this process. It helps keep the heat directed on the glue and away from the leds. Although if you don’t have one. 225 degrees for 10 minutes in the oven will not do immediate damage.
- If using heat gun. Run the heat along the channels on the back piece. Then run it along the lens channel to warm up and glue stuck on it. This also helps the lens cut through the glue as it’s not cooling it down as it is applied to the tail.
- Once warmed up thoroughly, quickly push the two together. Starting with the bottom outer edge first.
- If using the oven, I recommend placing the lens on top of the channel or as well as you can into it. Then putting it all in the oven to warm up together.
- Give it 5 minutes, then remove and push the two items together.
- While still warm put the back side screws back in their holes. This will help pull the tail tight together for a better seal.

Step 8:
Load resistors may be included for the turn signal function. If they are not preinstalled. Follow this video on how to attach them to your stock turn signal harness.